Purchase Return (PR)
This document explains how to create and process a Purchase Return (PR) in Jova POS, from PR input to Approval, Approved, or Rejected status.
Quick Flow
The general flow is:
- Create a new PR from the Purchases → Purchase Return menu.
- Complete the PR information and select the transaction/PO number to be returned.
- Add the product variations being returned and enter the return quantity.
- Save the PR.
- The PR goes to the Approval tab (awaiting approver).
- The approver can Approve (moves to Approved tab) or Reject (moves to Rejected tab).
1. Opening the Purchase Return Menu
- In the sidebar, click Purchases.
- Click Purchase Return.
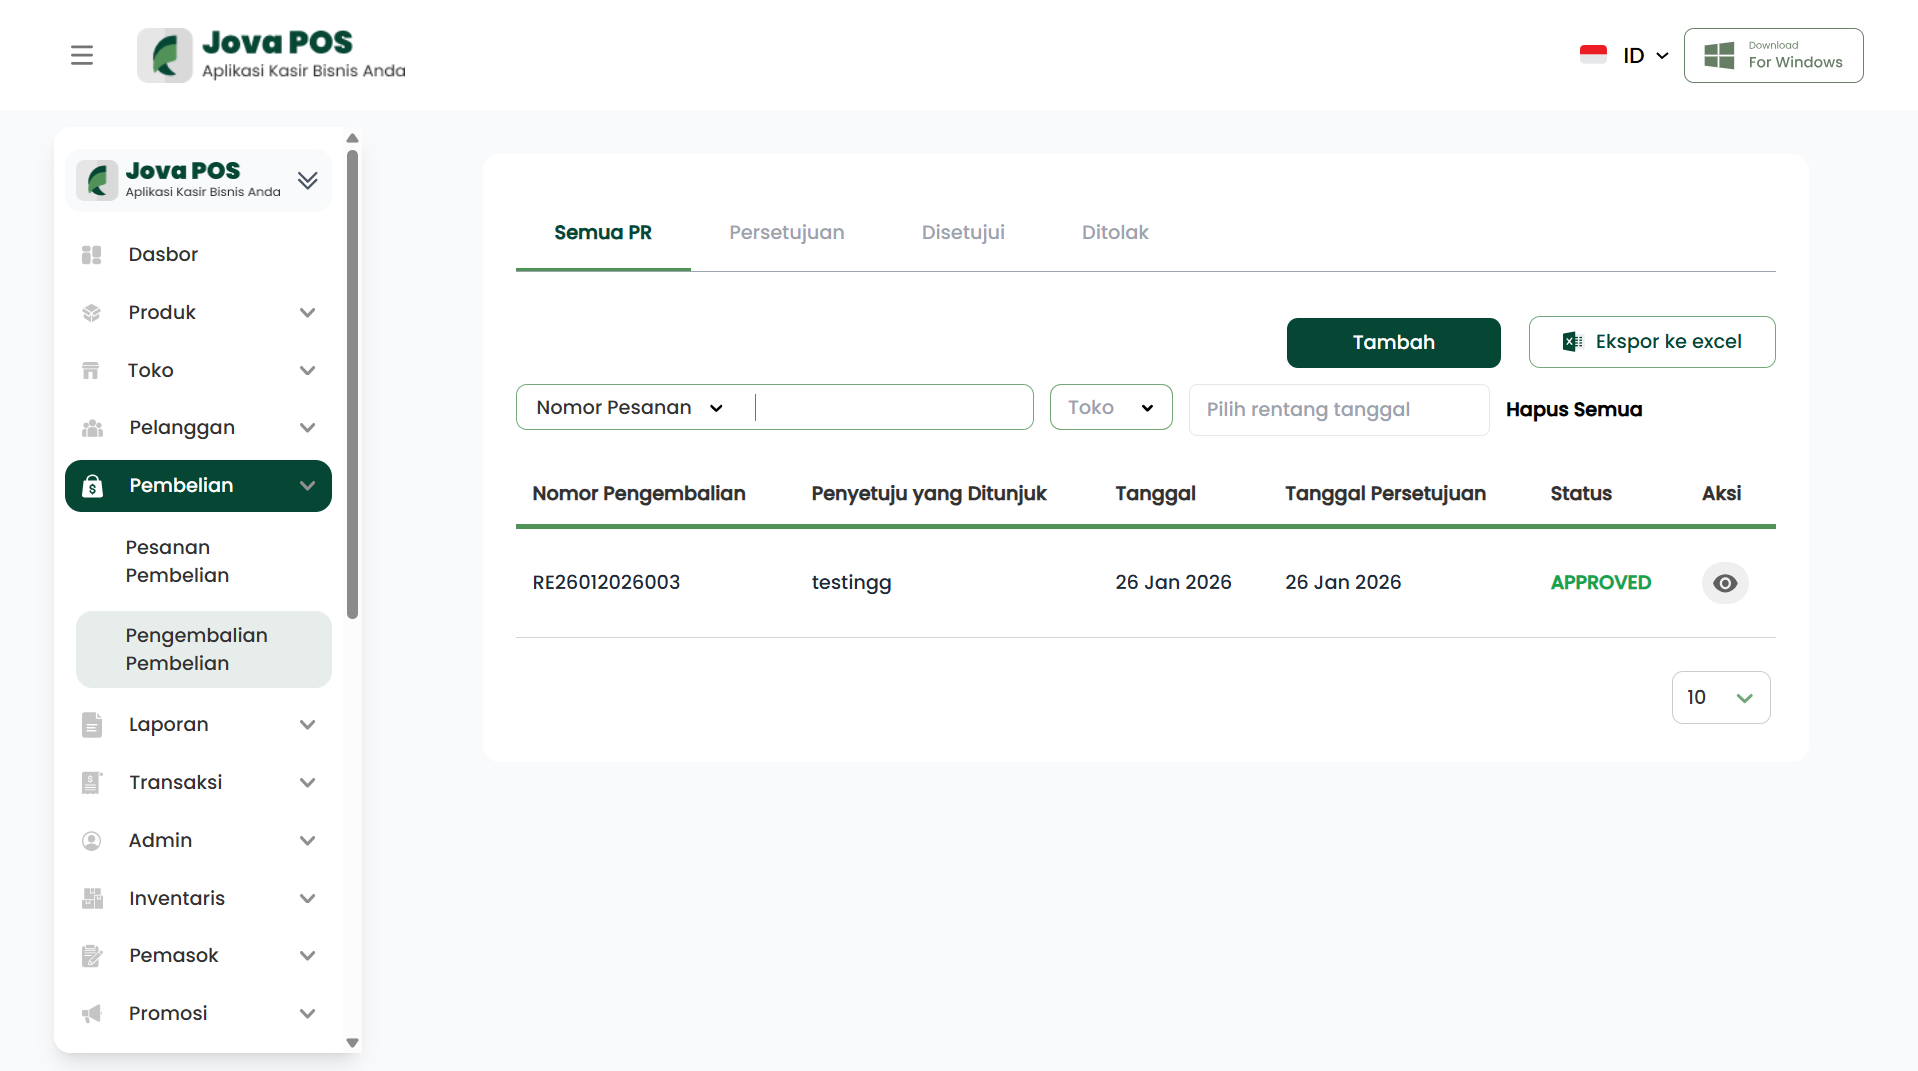
On this page you will see the PR process tabs:
- All PR: all PR data.
- Approval: PRs awaiting approver action.
- Approved: PRs that have been approved.
- Rejected: PRs that have been rejected.
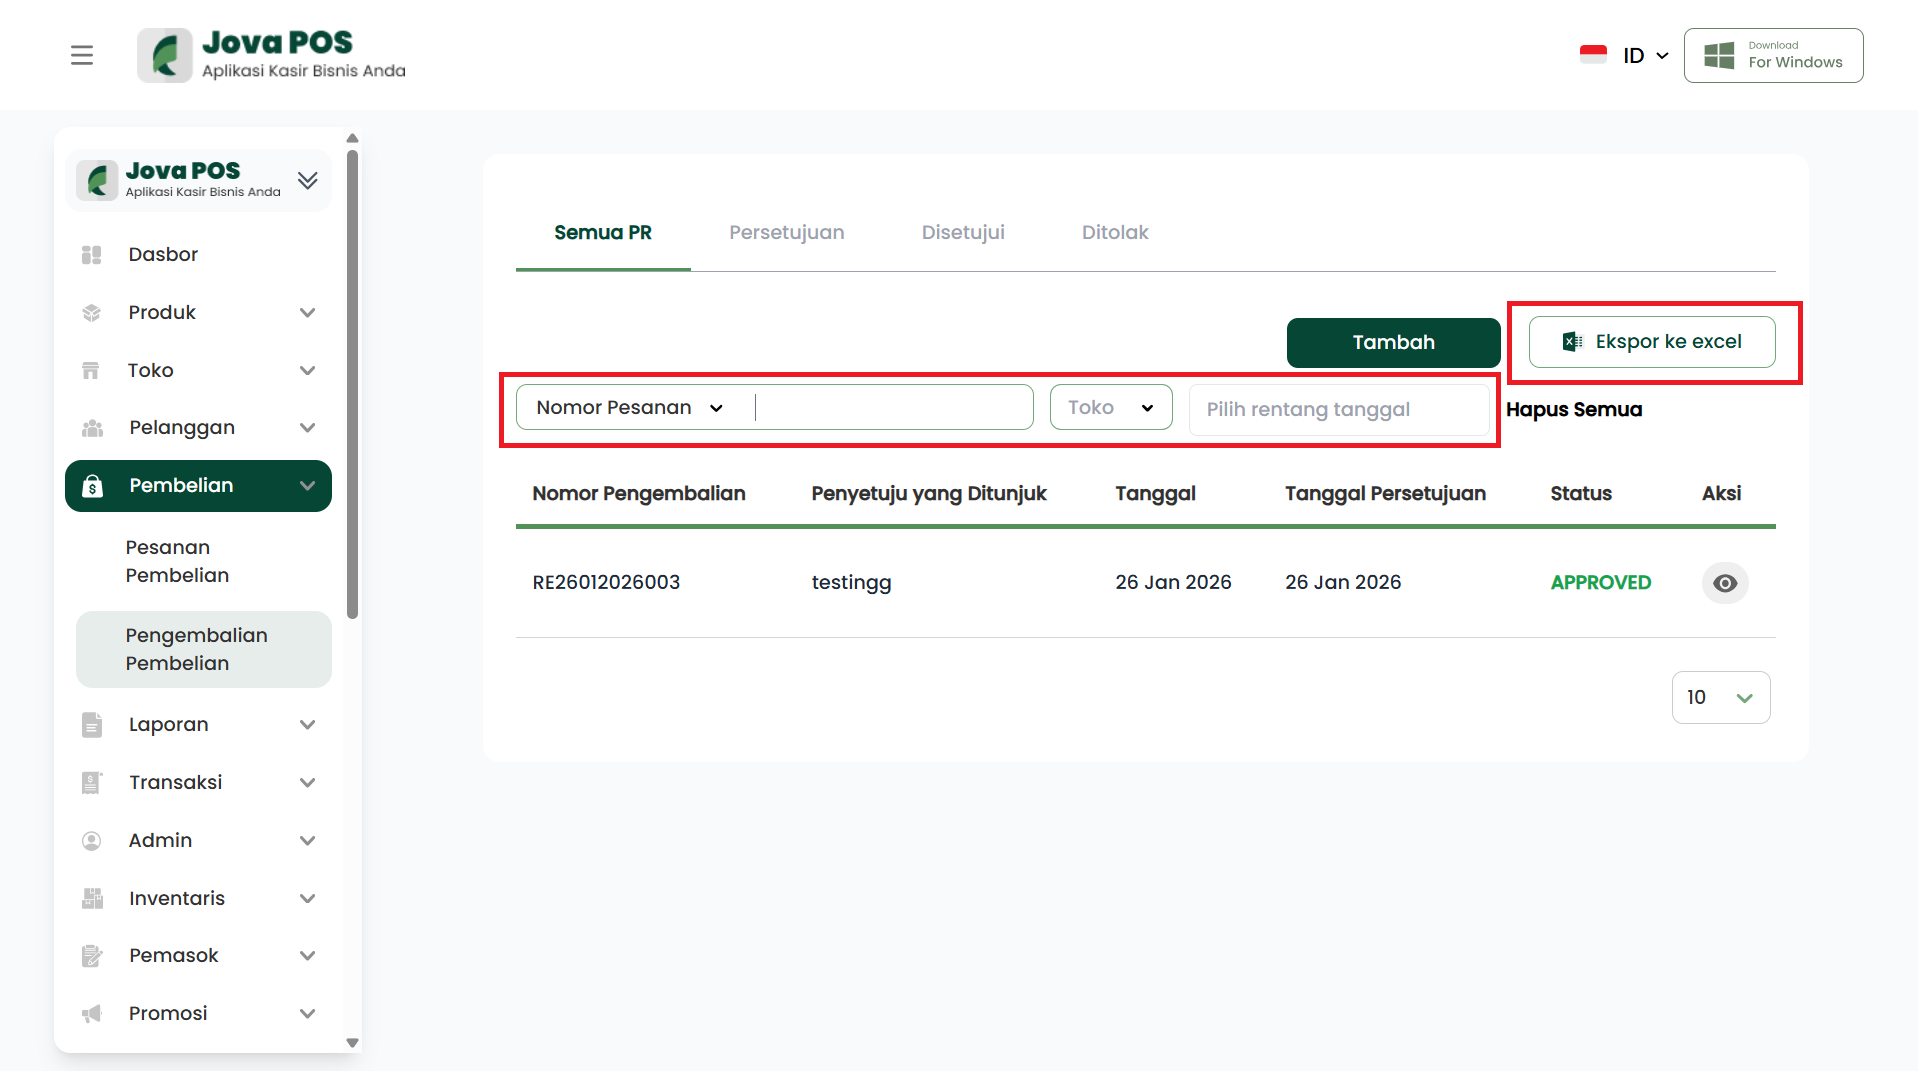
2. Filter and export data
In the All PR tab, you can:
- Filter by Order Number, Store, and date range.
- Click Clear All to reset filters.
- Click Export to excel to download PR data.
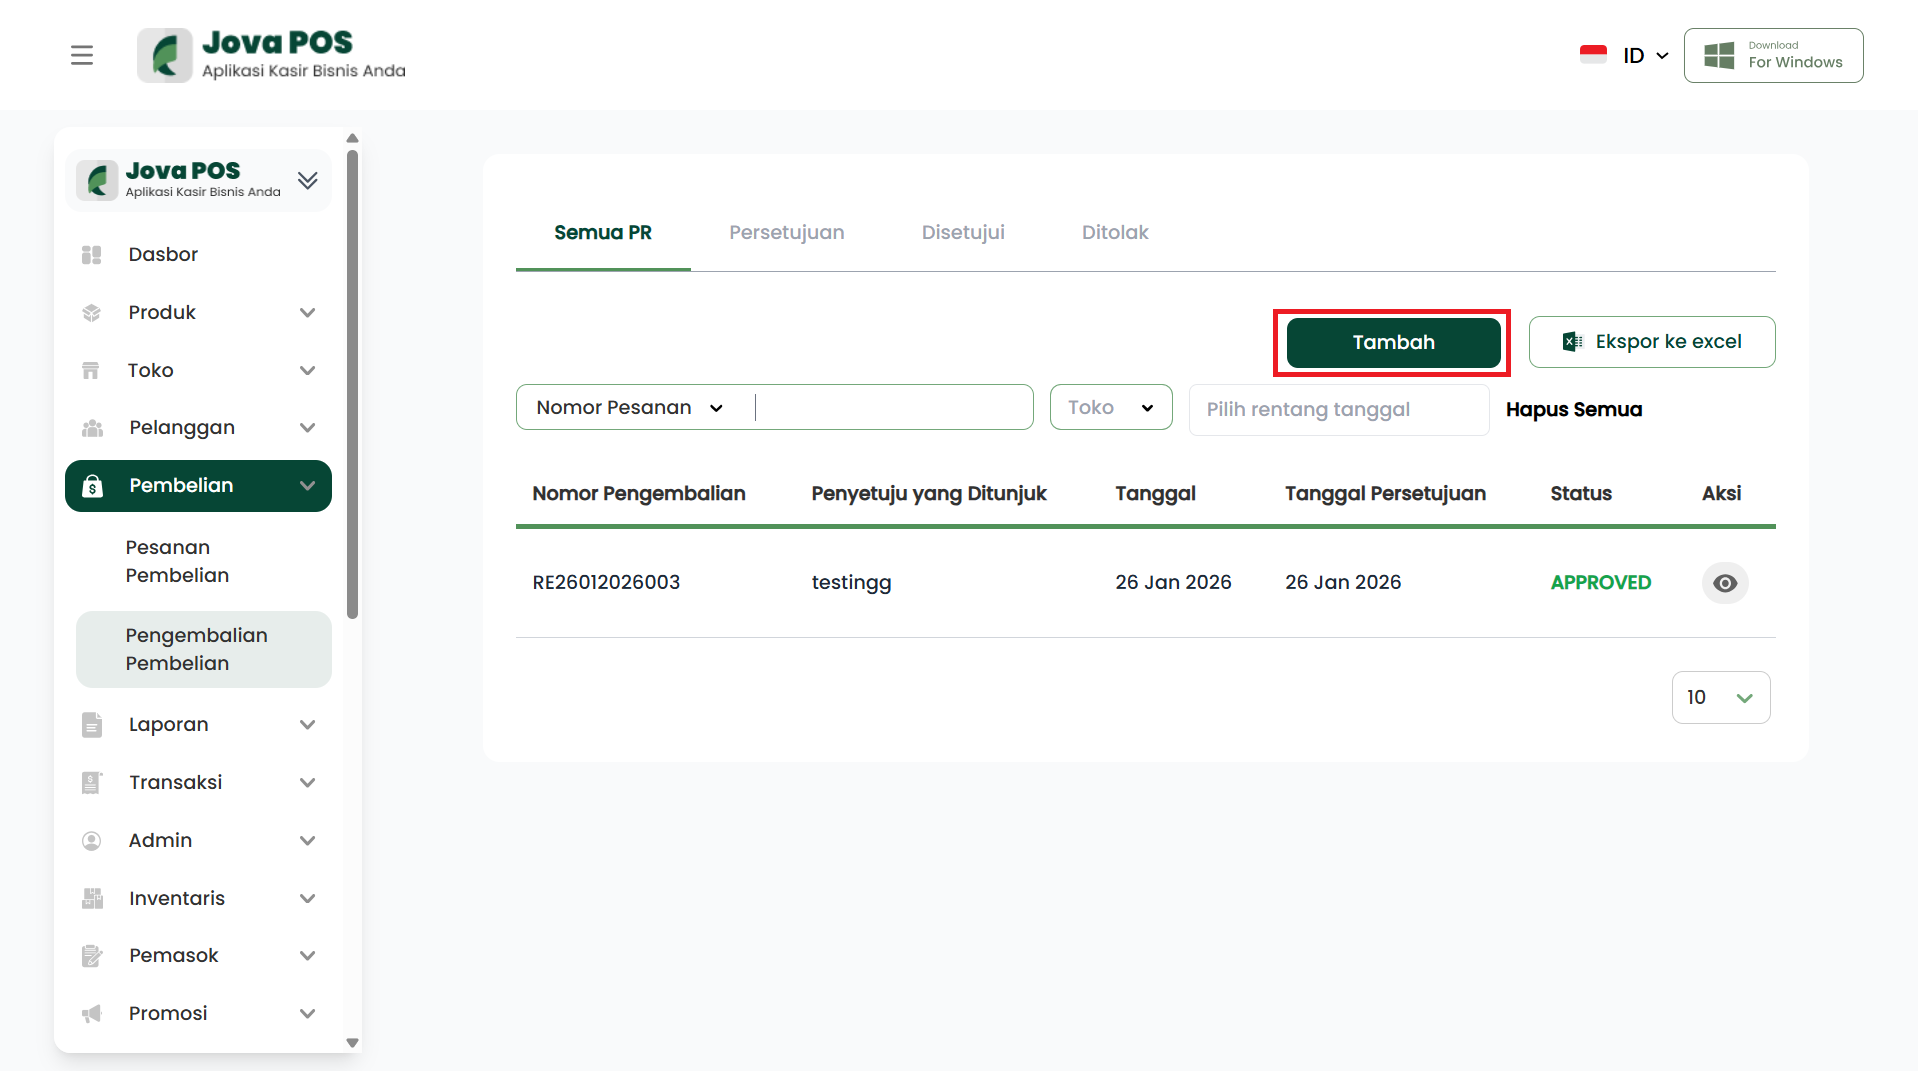
3. Creating a new PR
- Make sure you are in the All PR tab.
- Click the Add button.
- The system opens the Purchase Return Information form page.
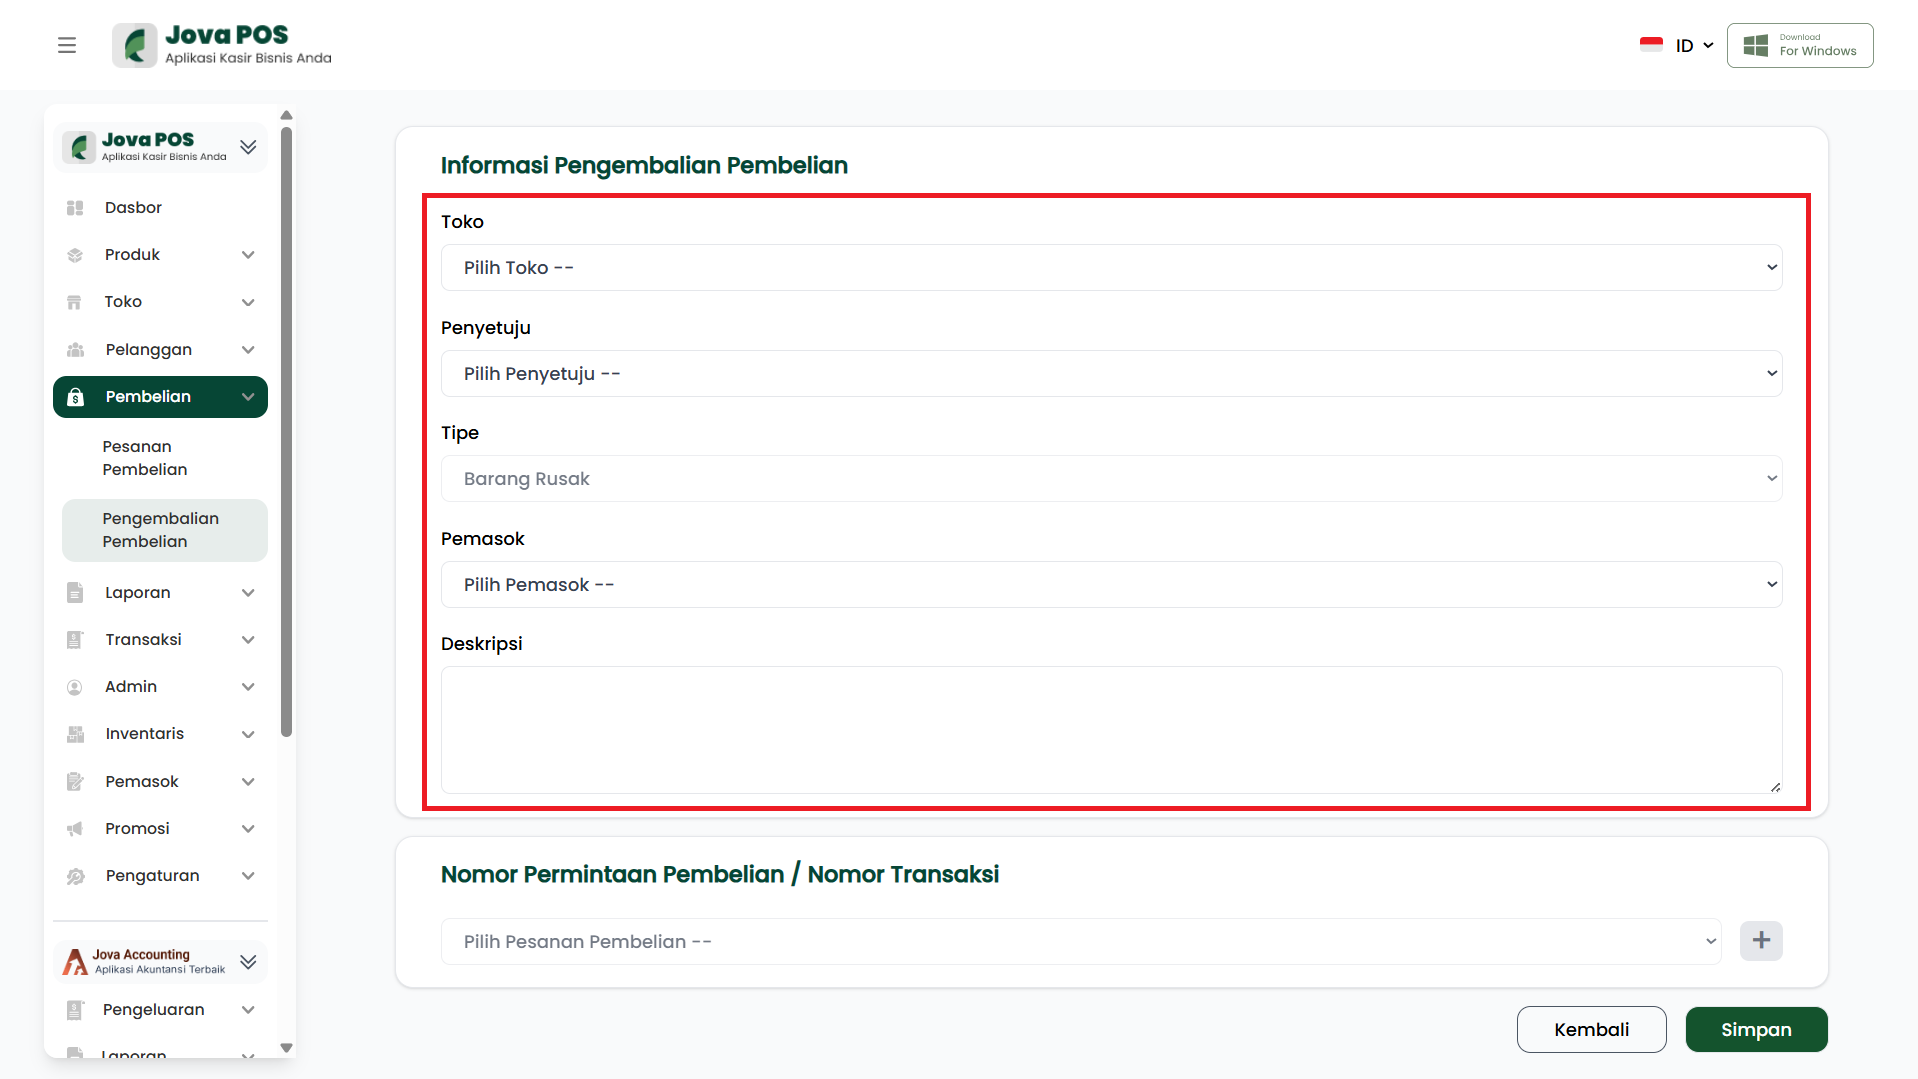
3.1 Filling in Purchase Return Information
Complete the following fields as needed:
- Store: select the branch/warehouse.
- Approver: select the user who will approve.
- Type: select the return type (e.g.: Damaged Goods).
- Supplier: select the supplier.
- Description: enter the reason/brief description.
3.2 Selecting Transaction Number / Purchase Order
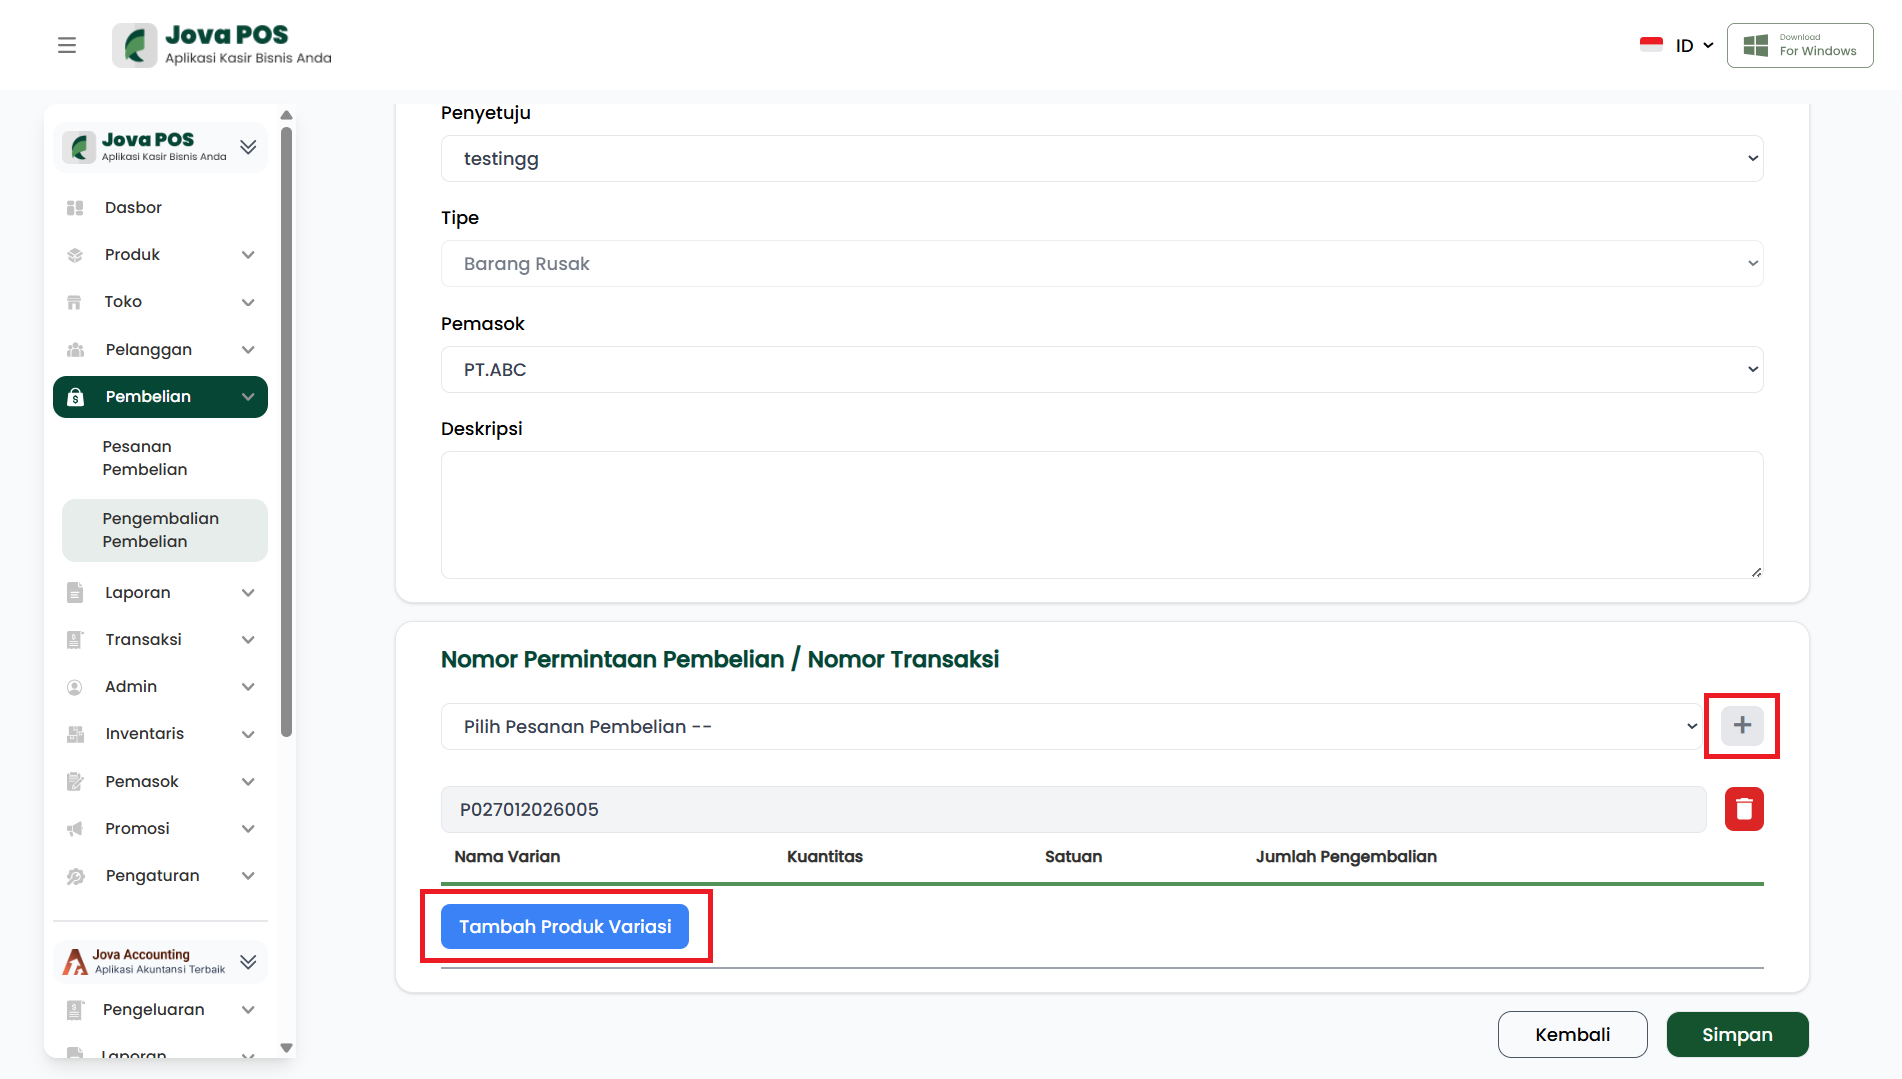
- In the Purchase Request Number / Transaction Number section, click the dropdown.
- Select the transaction/PO number for which the PR will be created.
- Click the ( + ) button to add that transaction to the PR item list.

4. Adding returned products
- In the PR item table, click the Add Product Variation button.
- A Add Variation popup appears.
- Search for the product (optional) using the Search column.
- Check the product variations to return.
- Click the Add button.
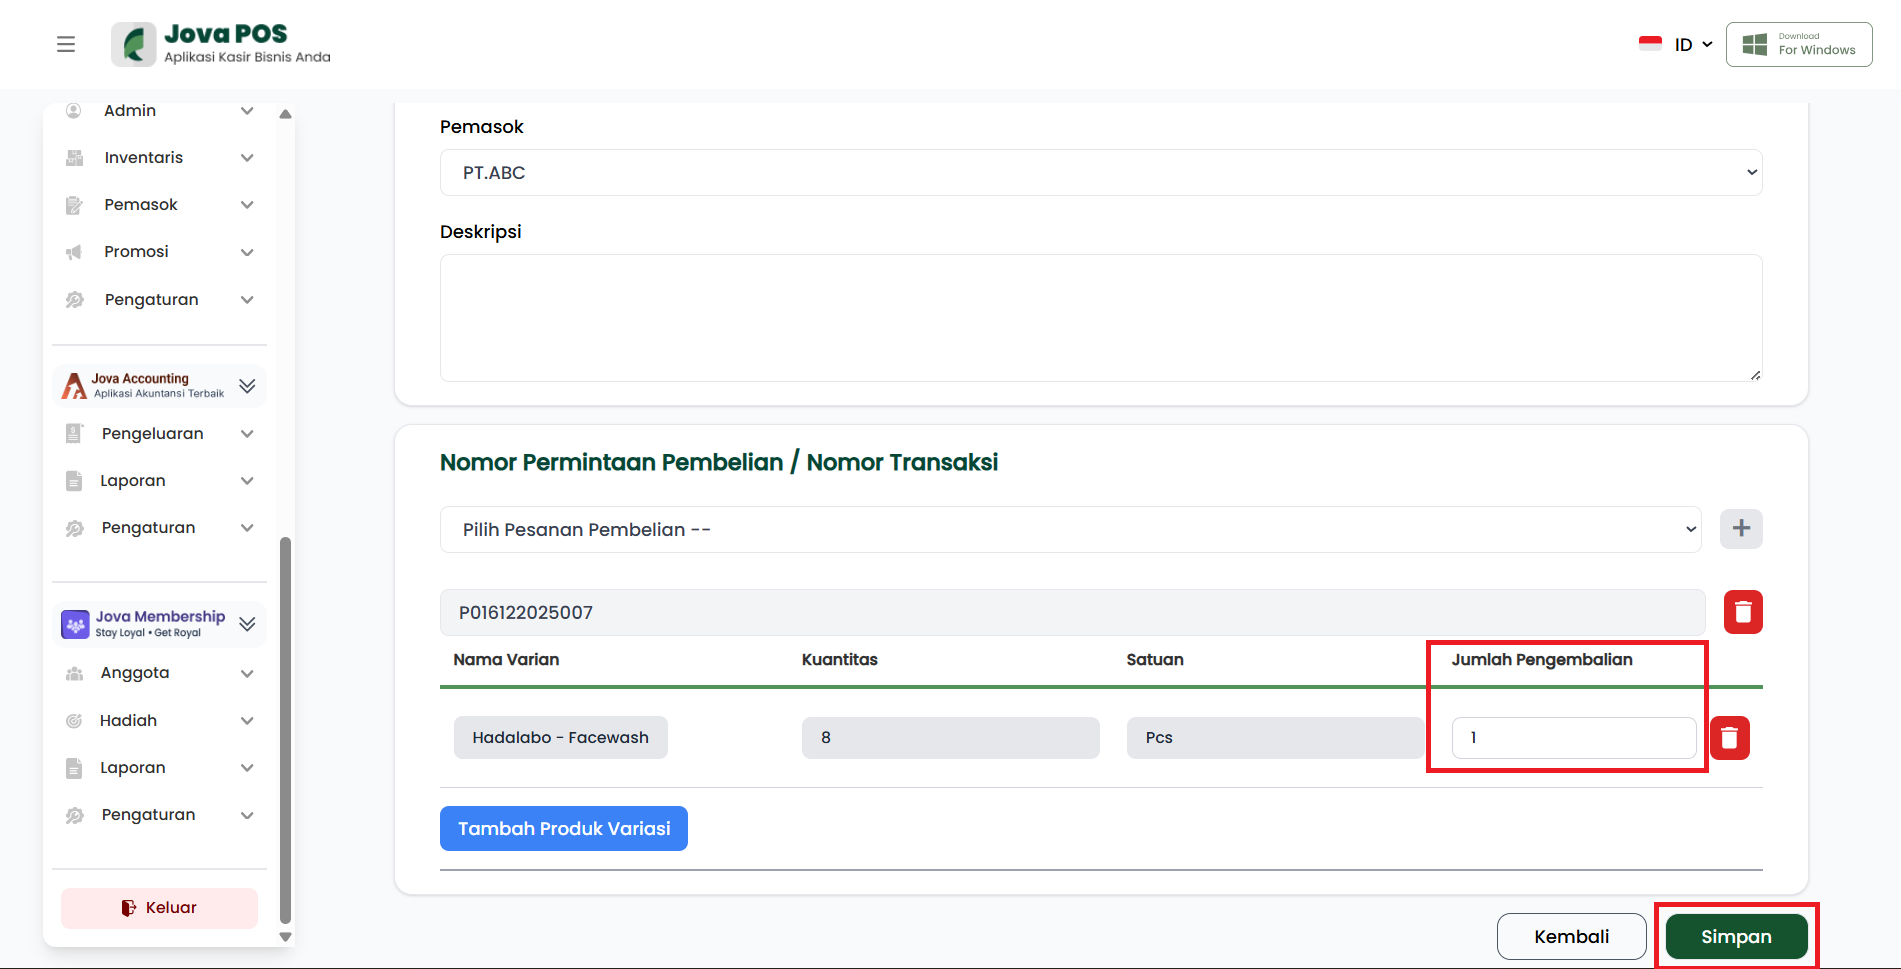
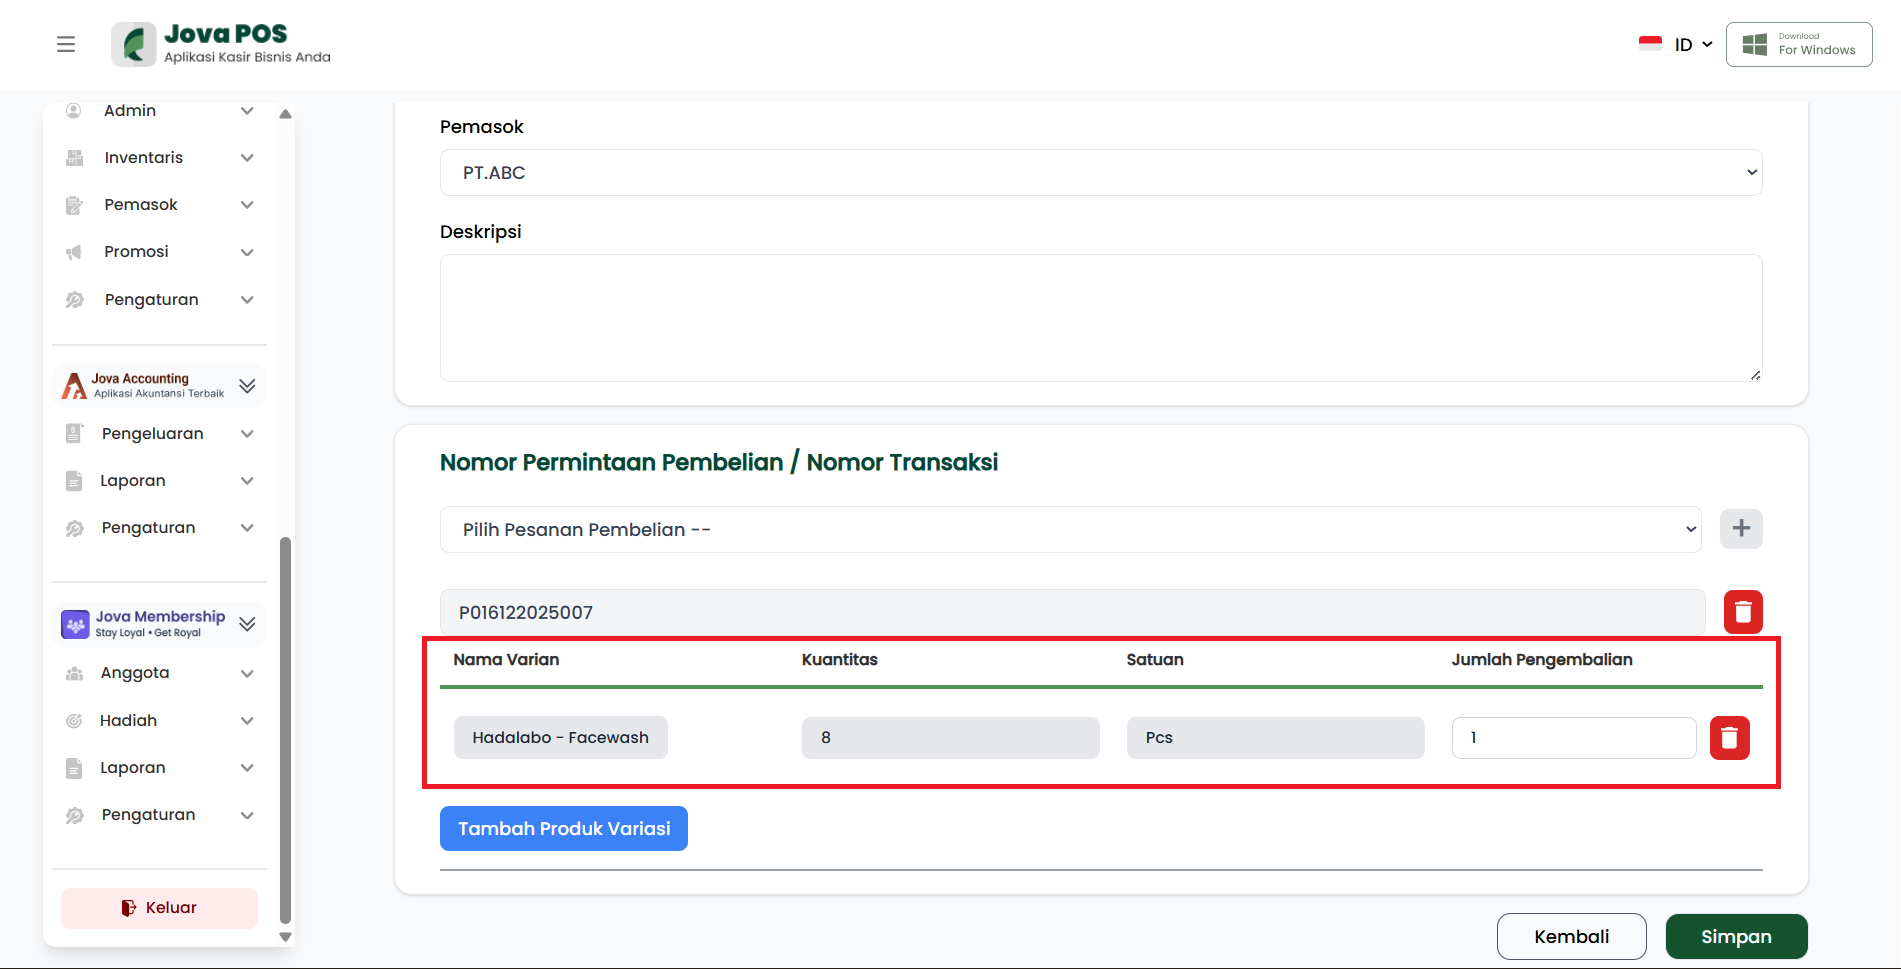
After variations are added, they will appear in the PR item table.
5. Entering return quantity and saving
- In the Return Quantity column, enter the number of units being returned.
- Make sure the return quantity does not exceed the available/recorded quantity on the transaction.
- Click Save to save the PR.
- Click Back if you want to cancel and return to the list.
6. Approval Tab (awaiting approver)
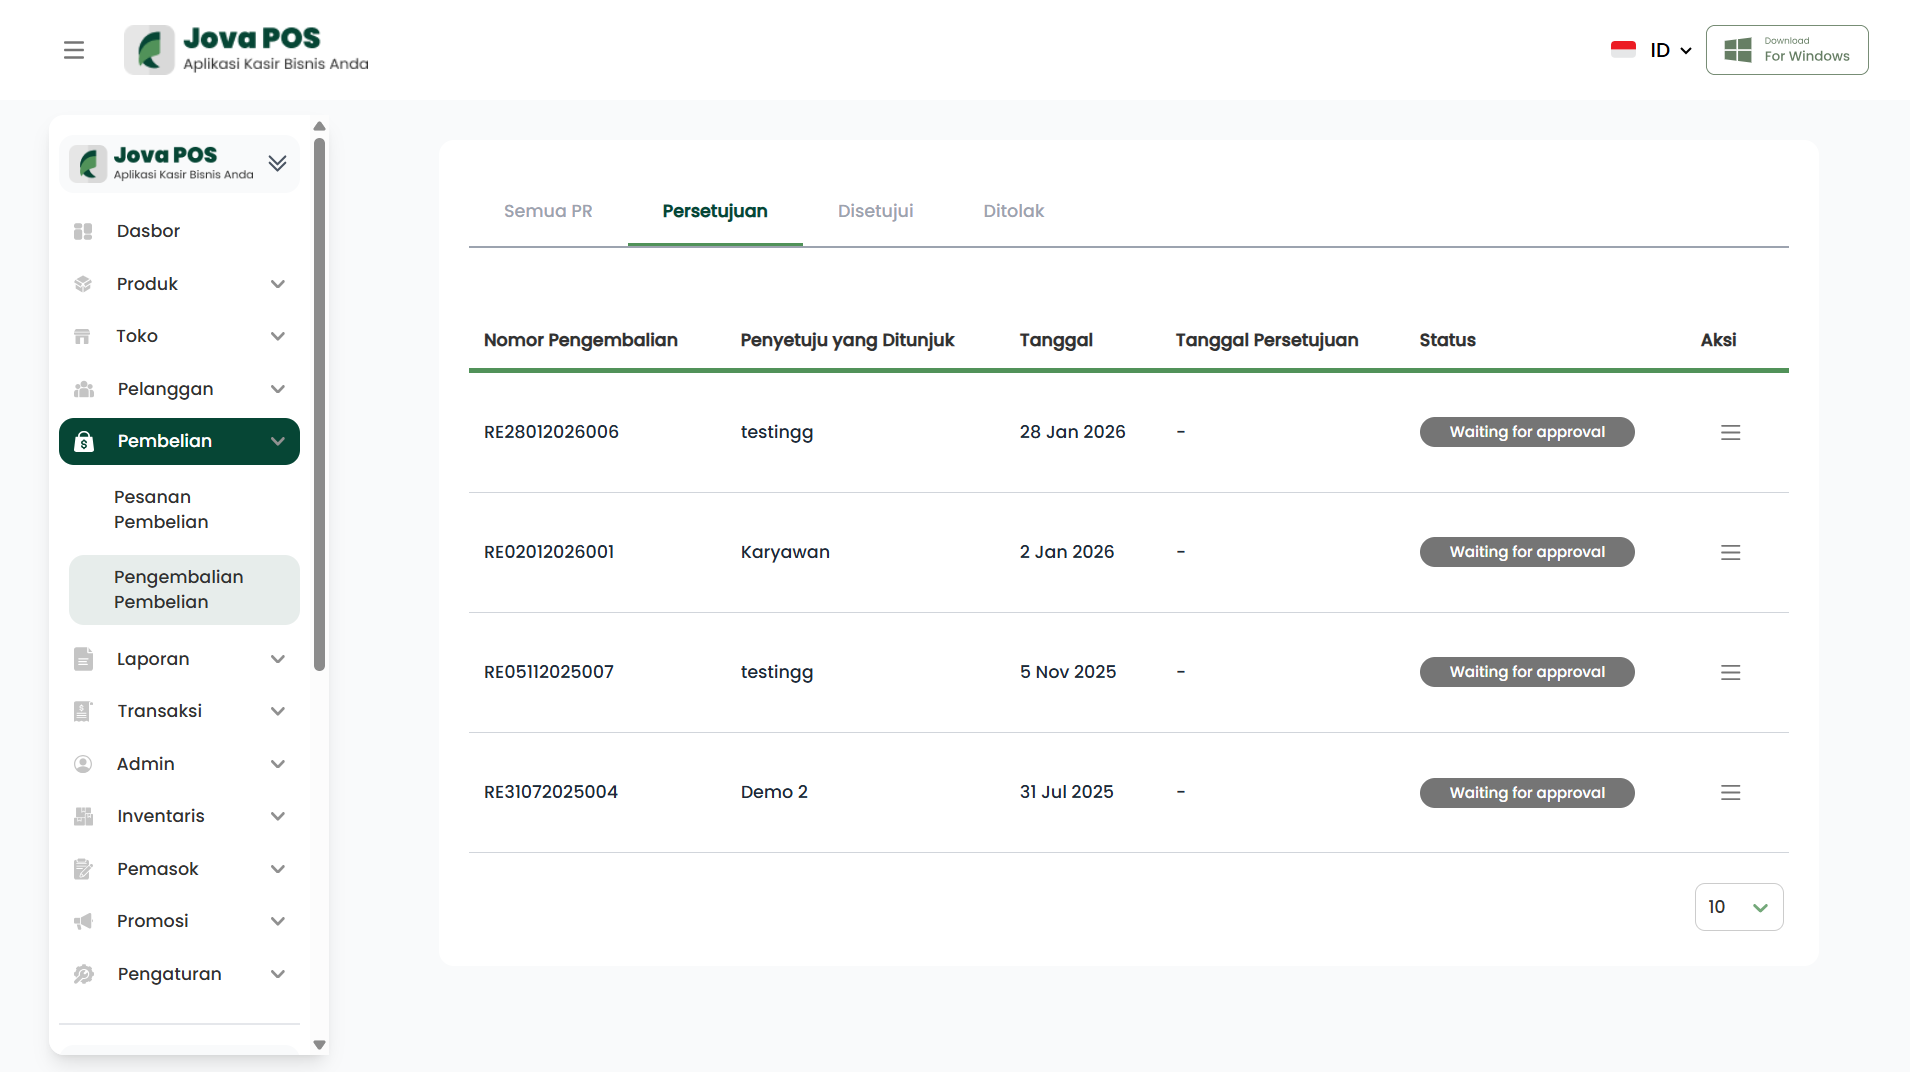
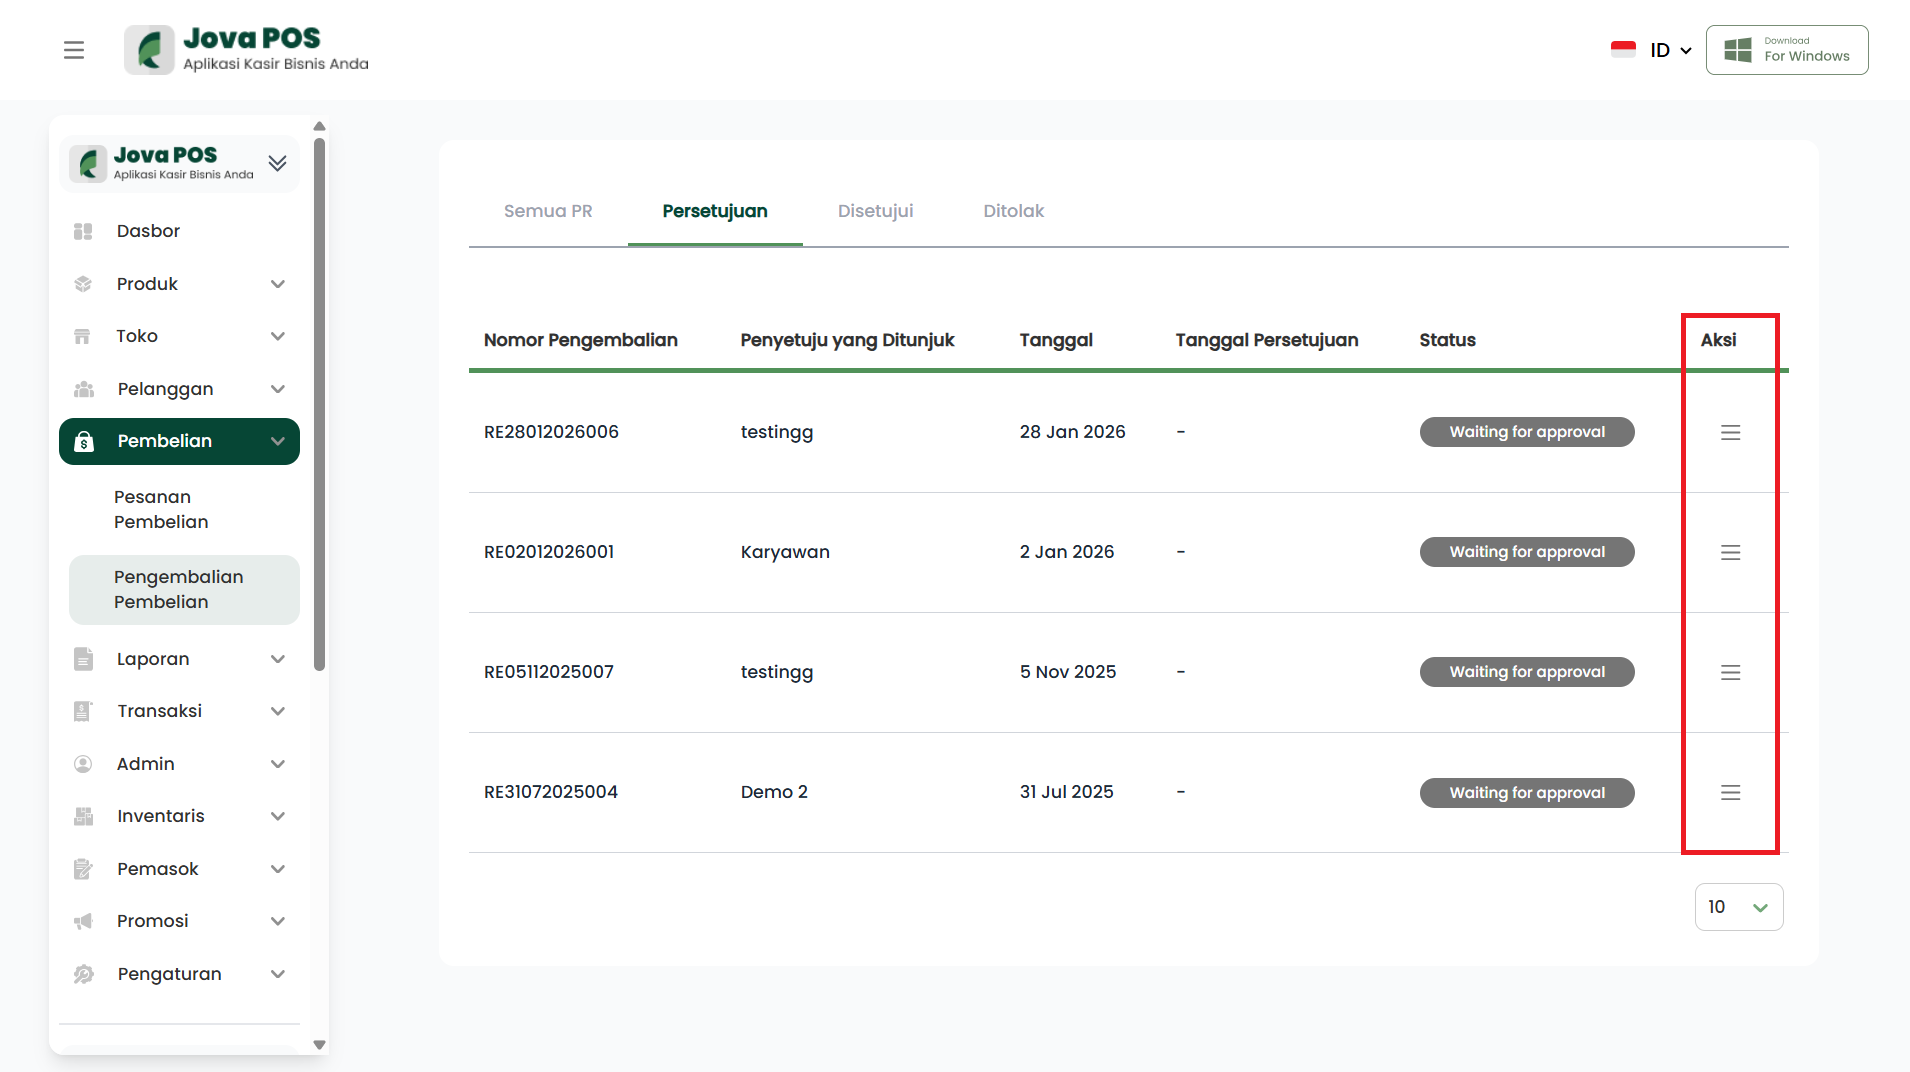
After the PR is saved, the data will usually appear in the Approval tab with Waiting for approval status.
6.1 Viewing PR details in the Approval tab
- Click the Action button (three-line icon) on the PR row.
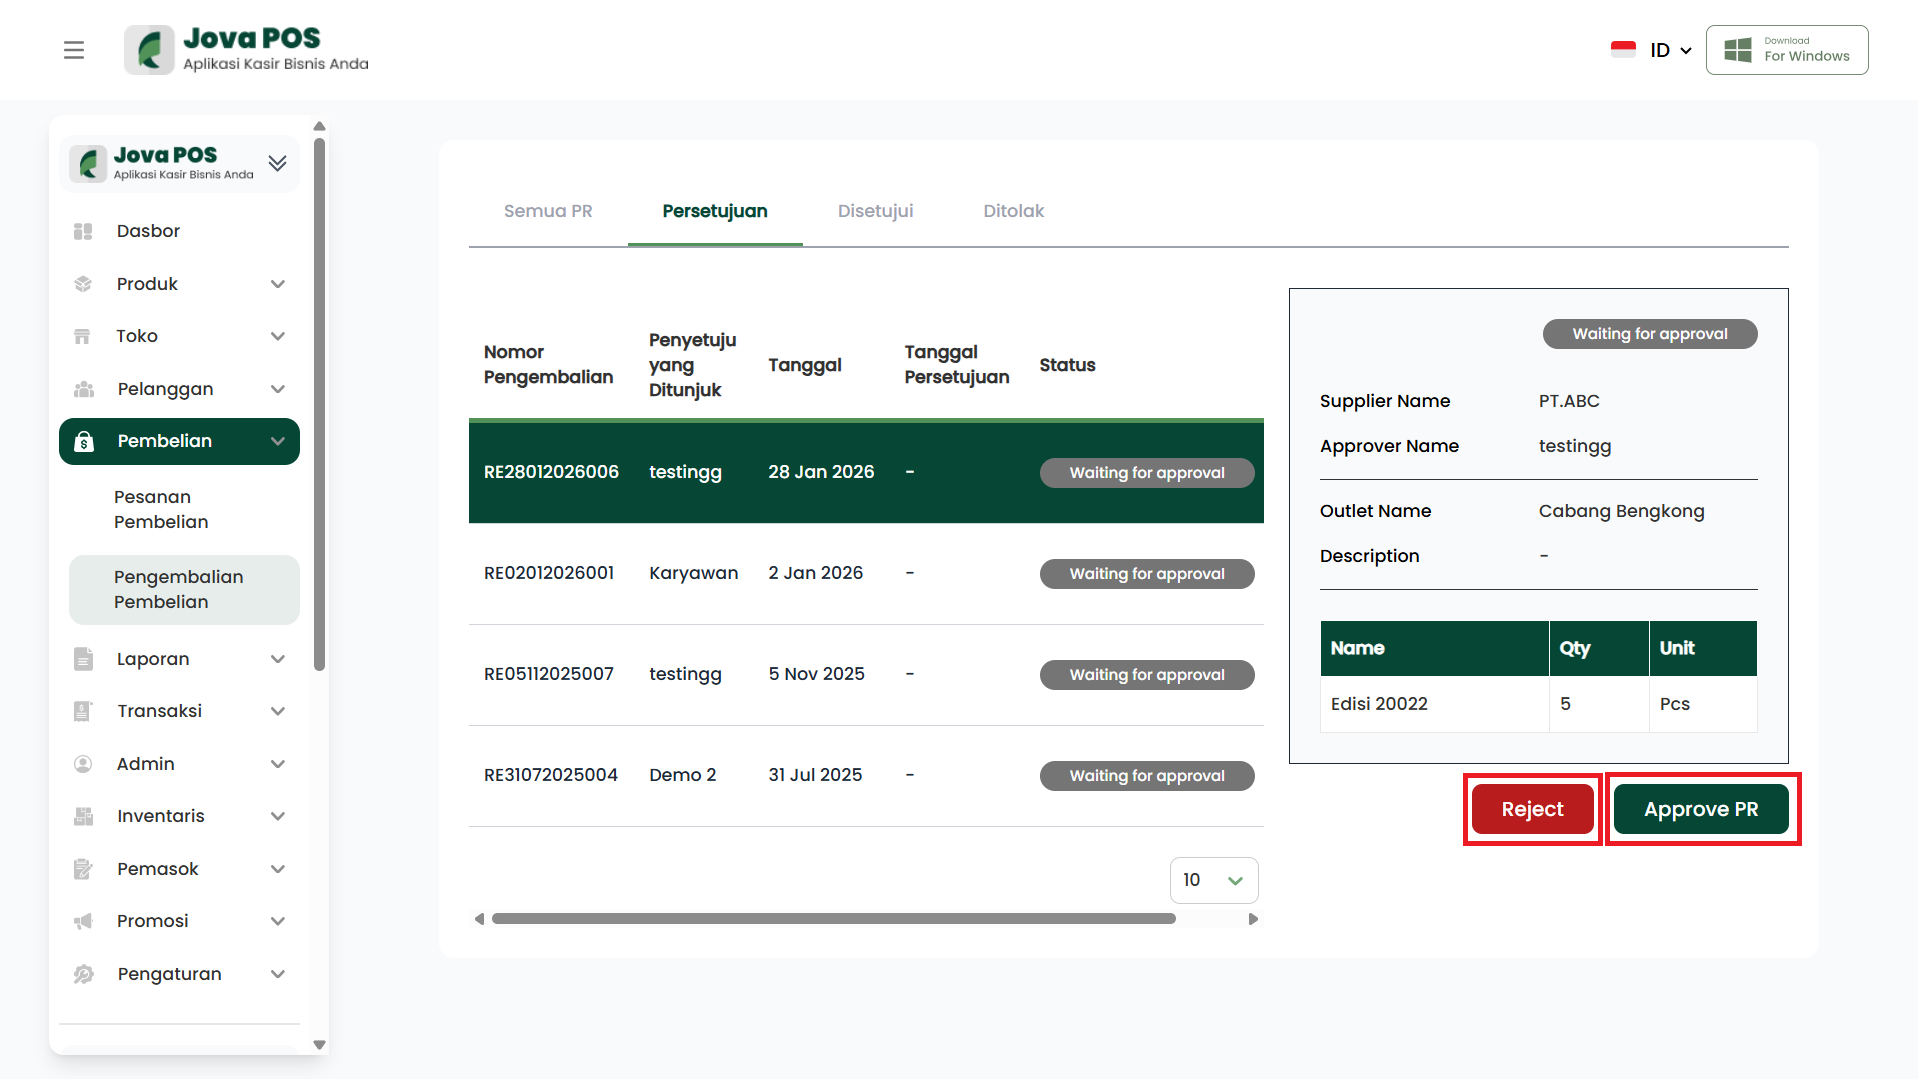
- PR details will appear in the right panel.
6.2 Approve or Reject PR
In the detail panel (right), the approver can:
- Click Approve PR to approve the PR → PR moves to the Approved tab.
- Click Reject to reject the PR → PR moves to the Rejected tab.
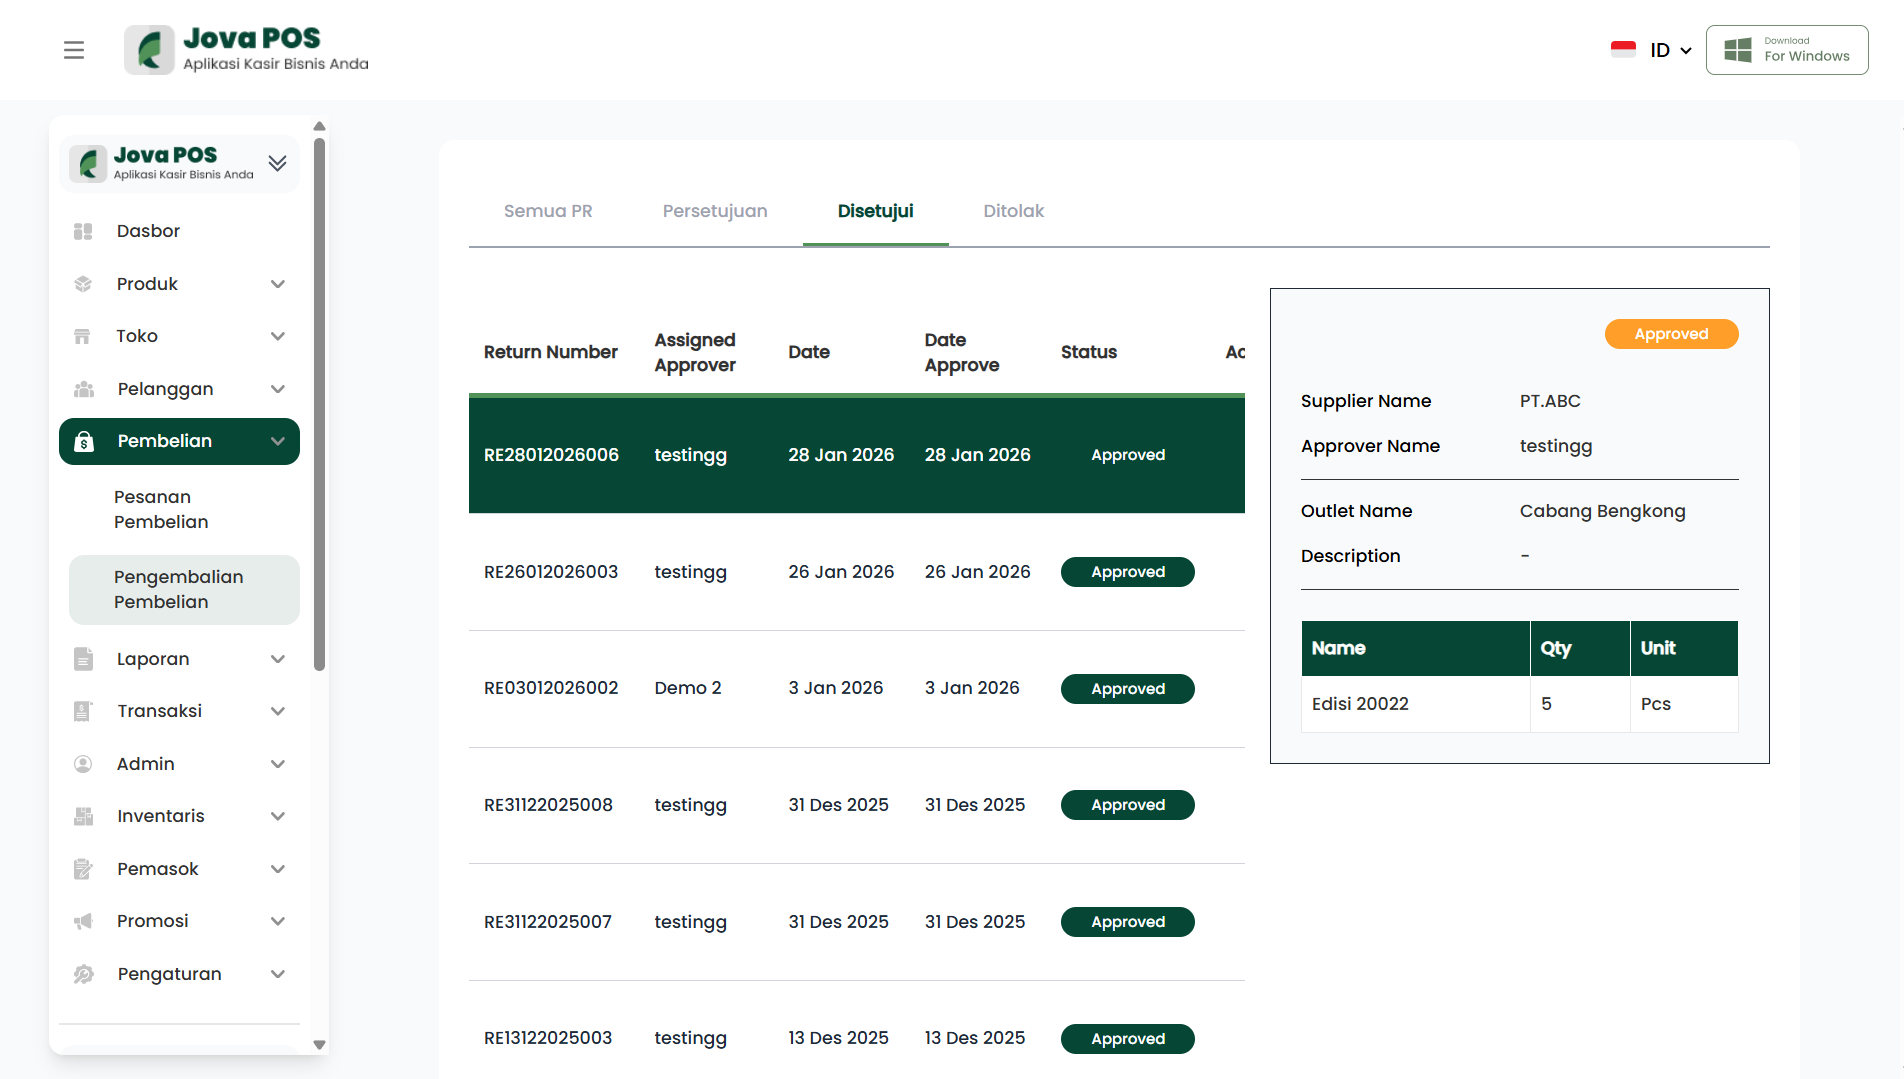
7. Approved Tab
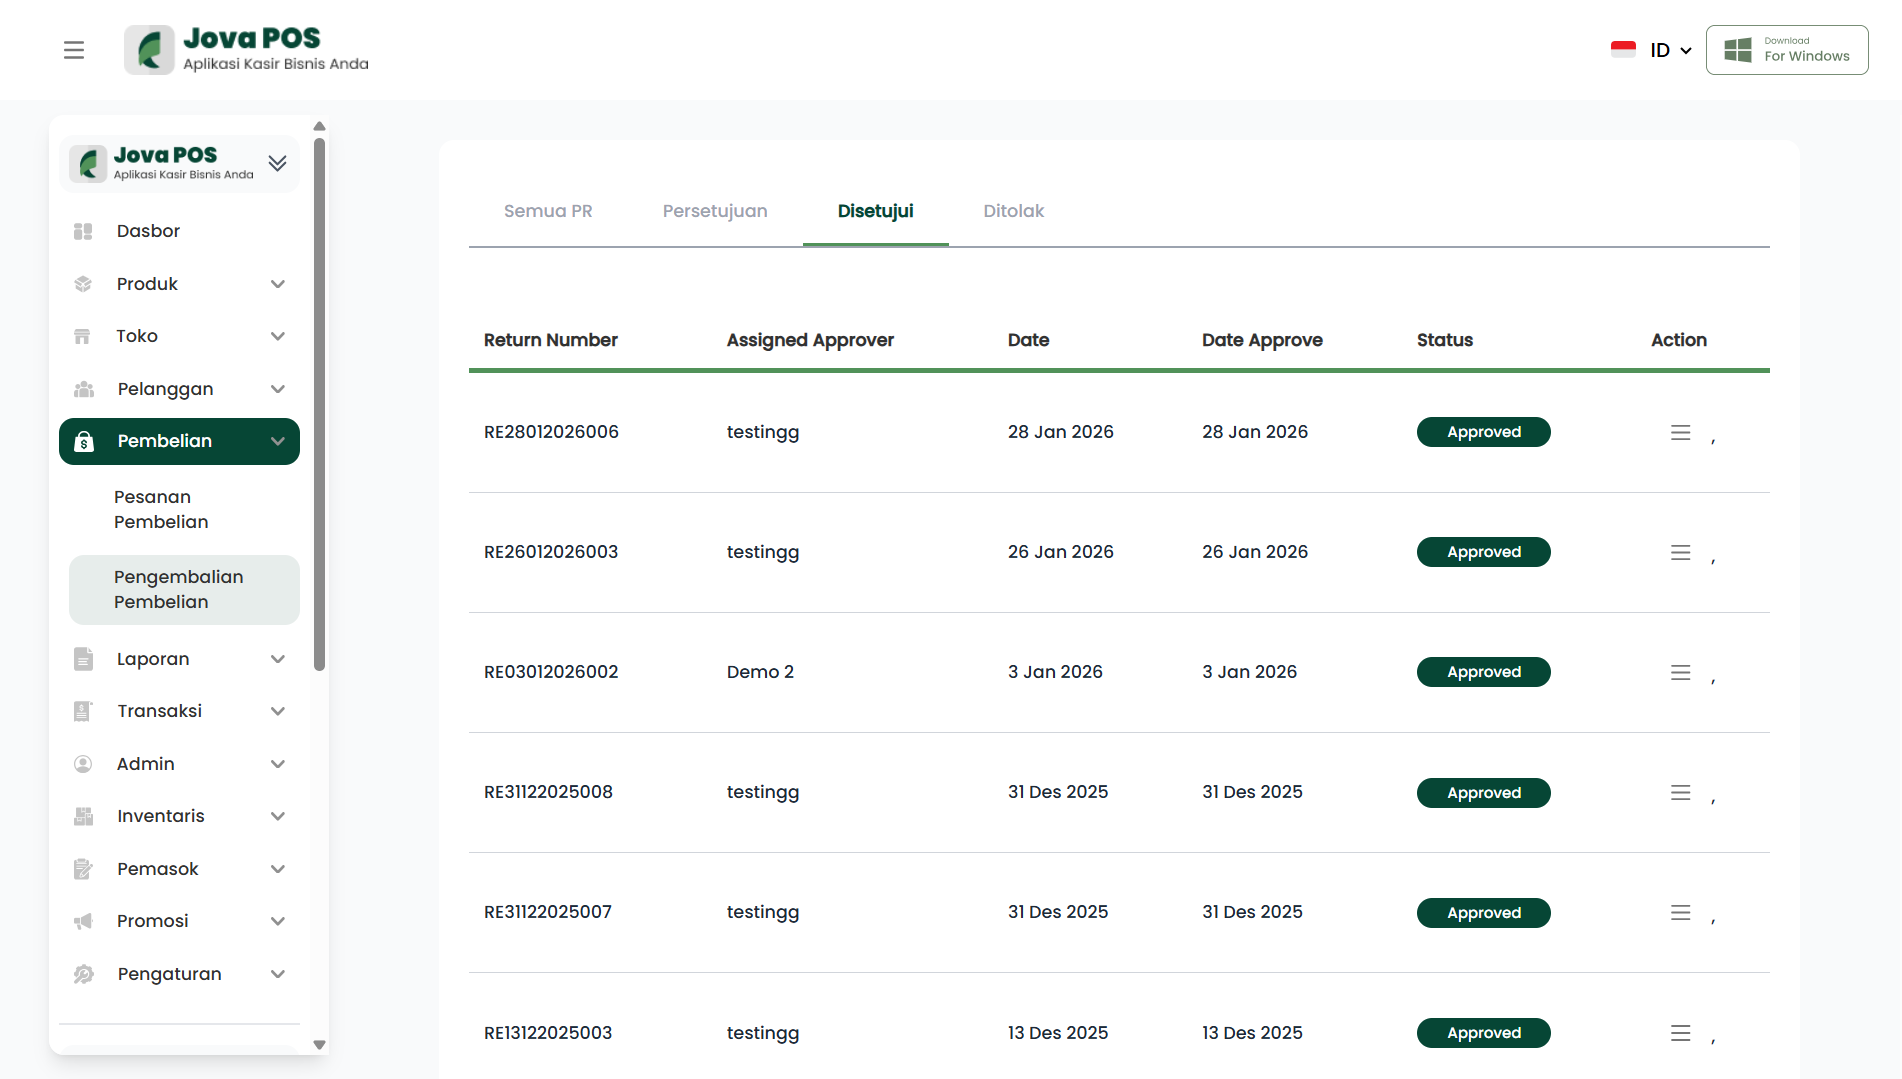
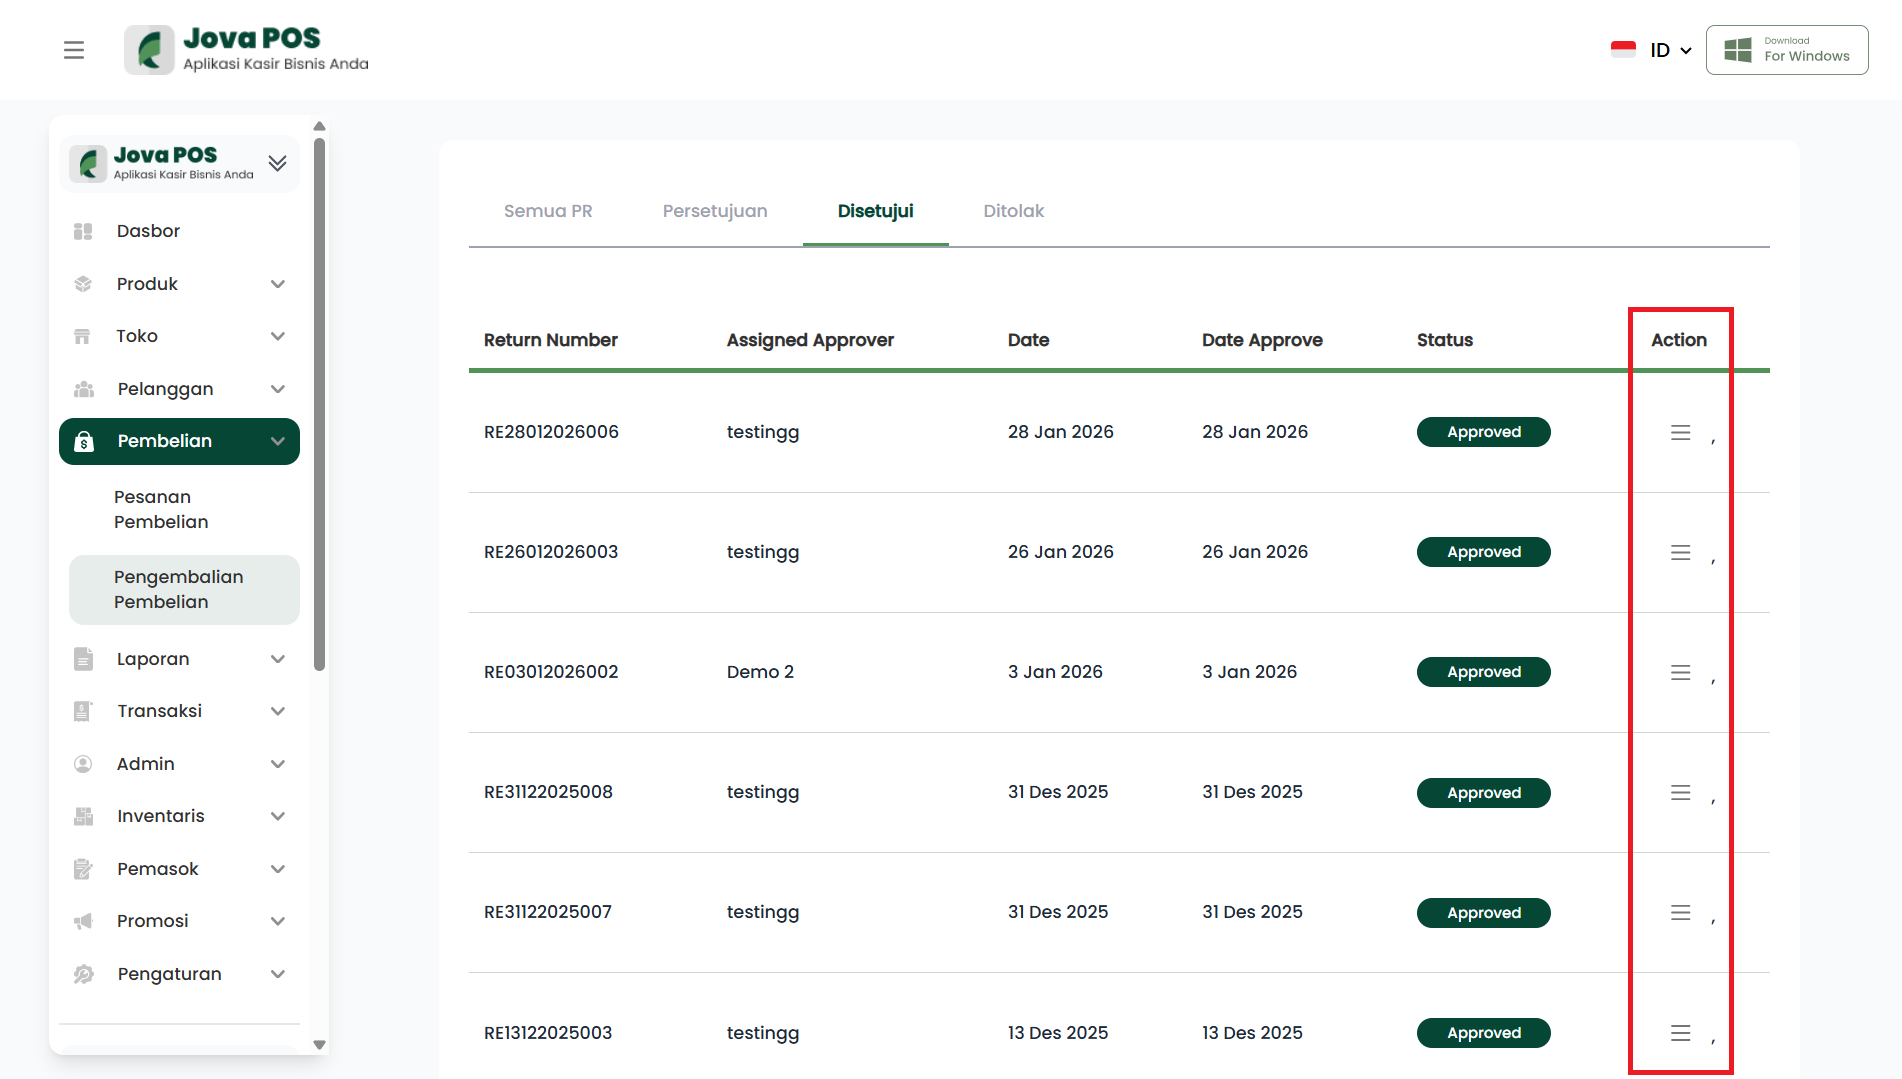
Approved PRs will appear in the Approved tab with Approved status and display the approval date.
7.1 Viewing approved PR details
- Click the Action button (three-line icon) on the PR row.
- PR details appear in the right panel (including supplier, approver, outlet, and item information).
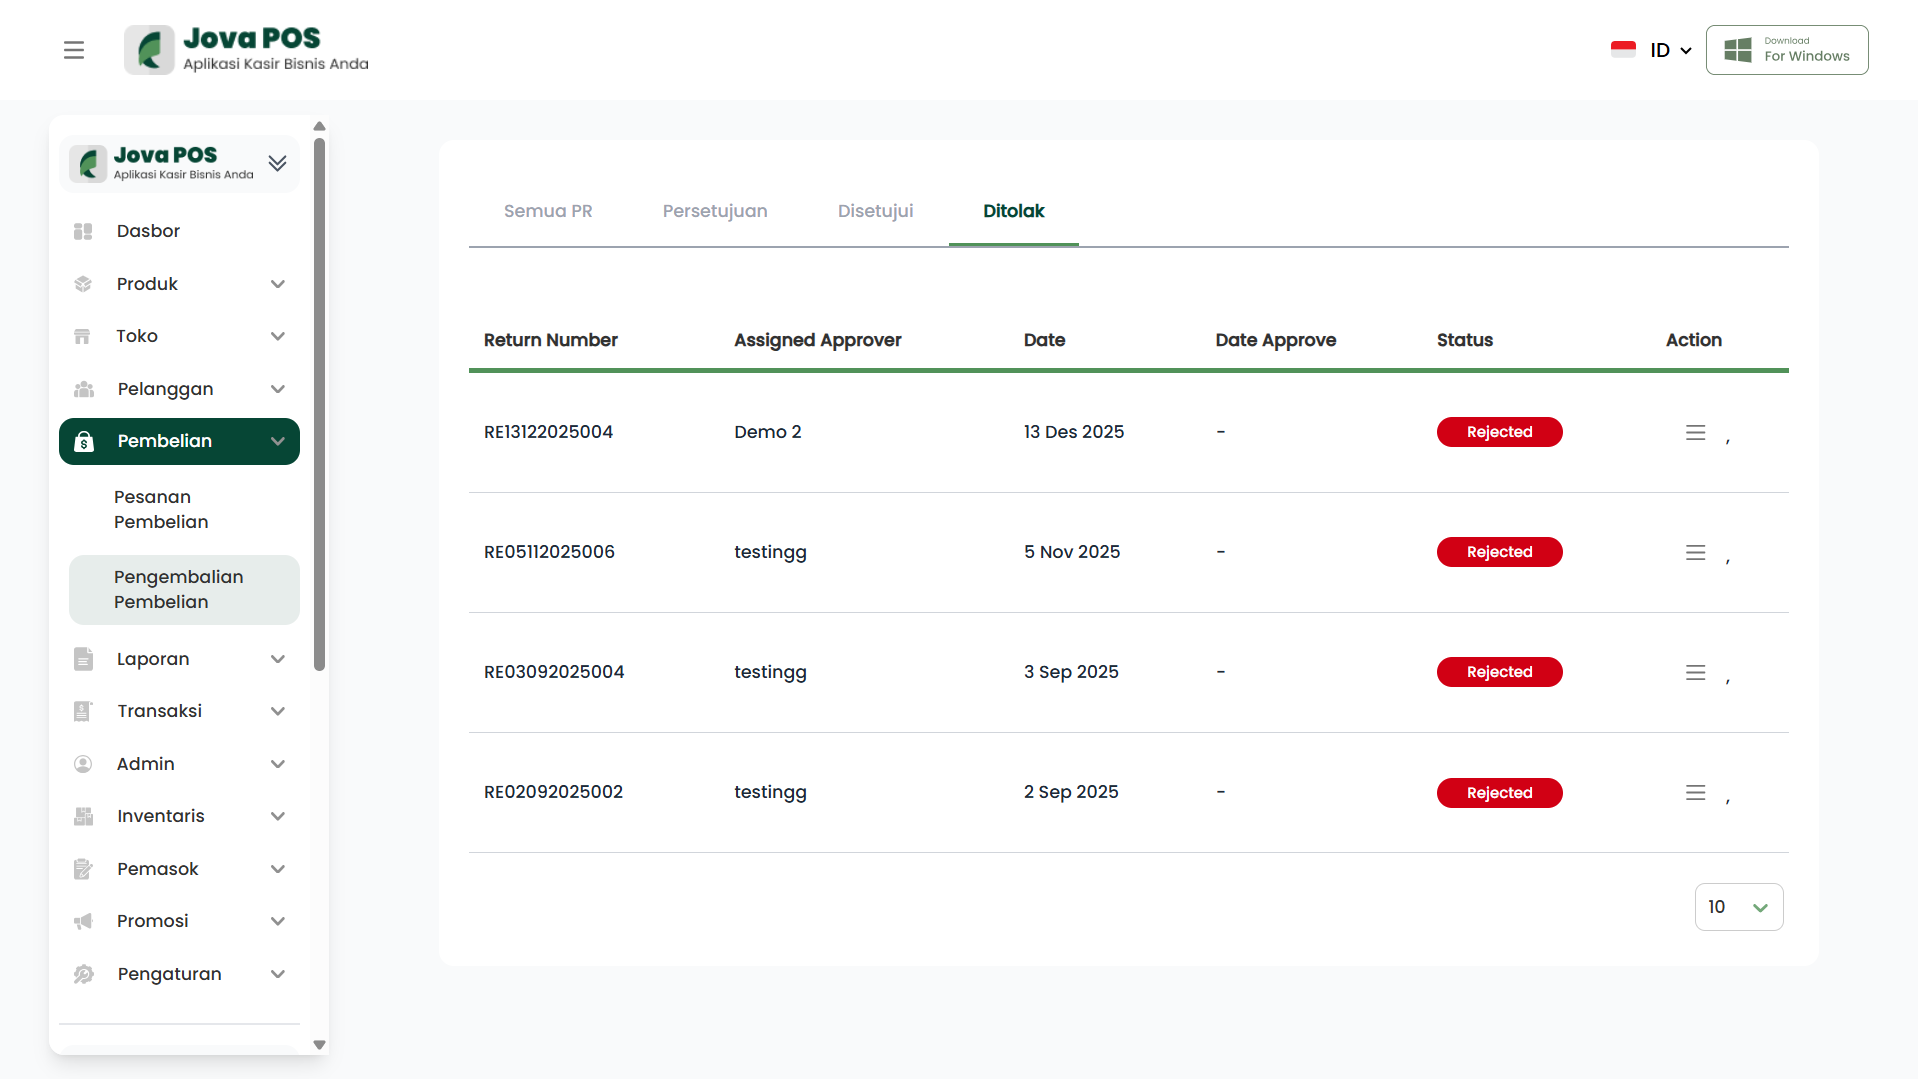
8. Rejected Tab
Rejected PRs will move to the Rejected tab and the status will show as Rejected.
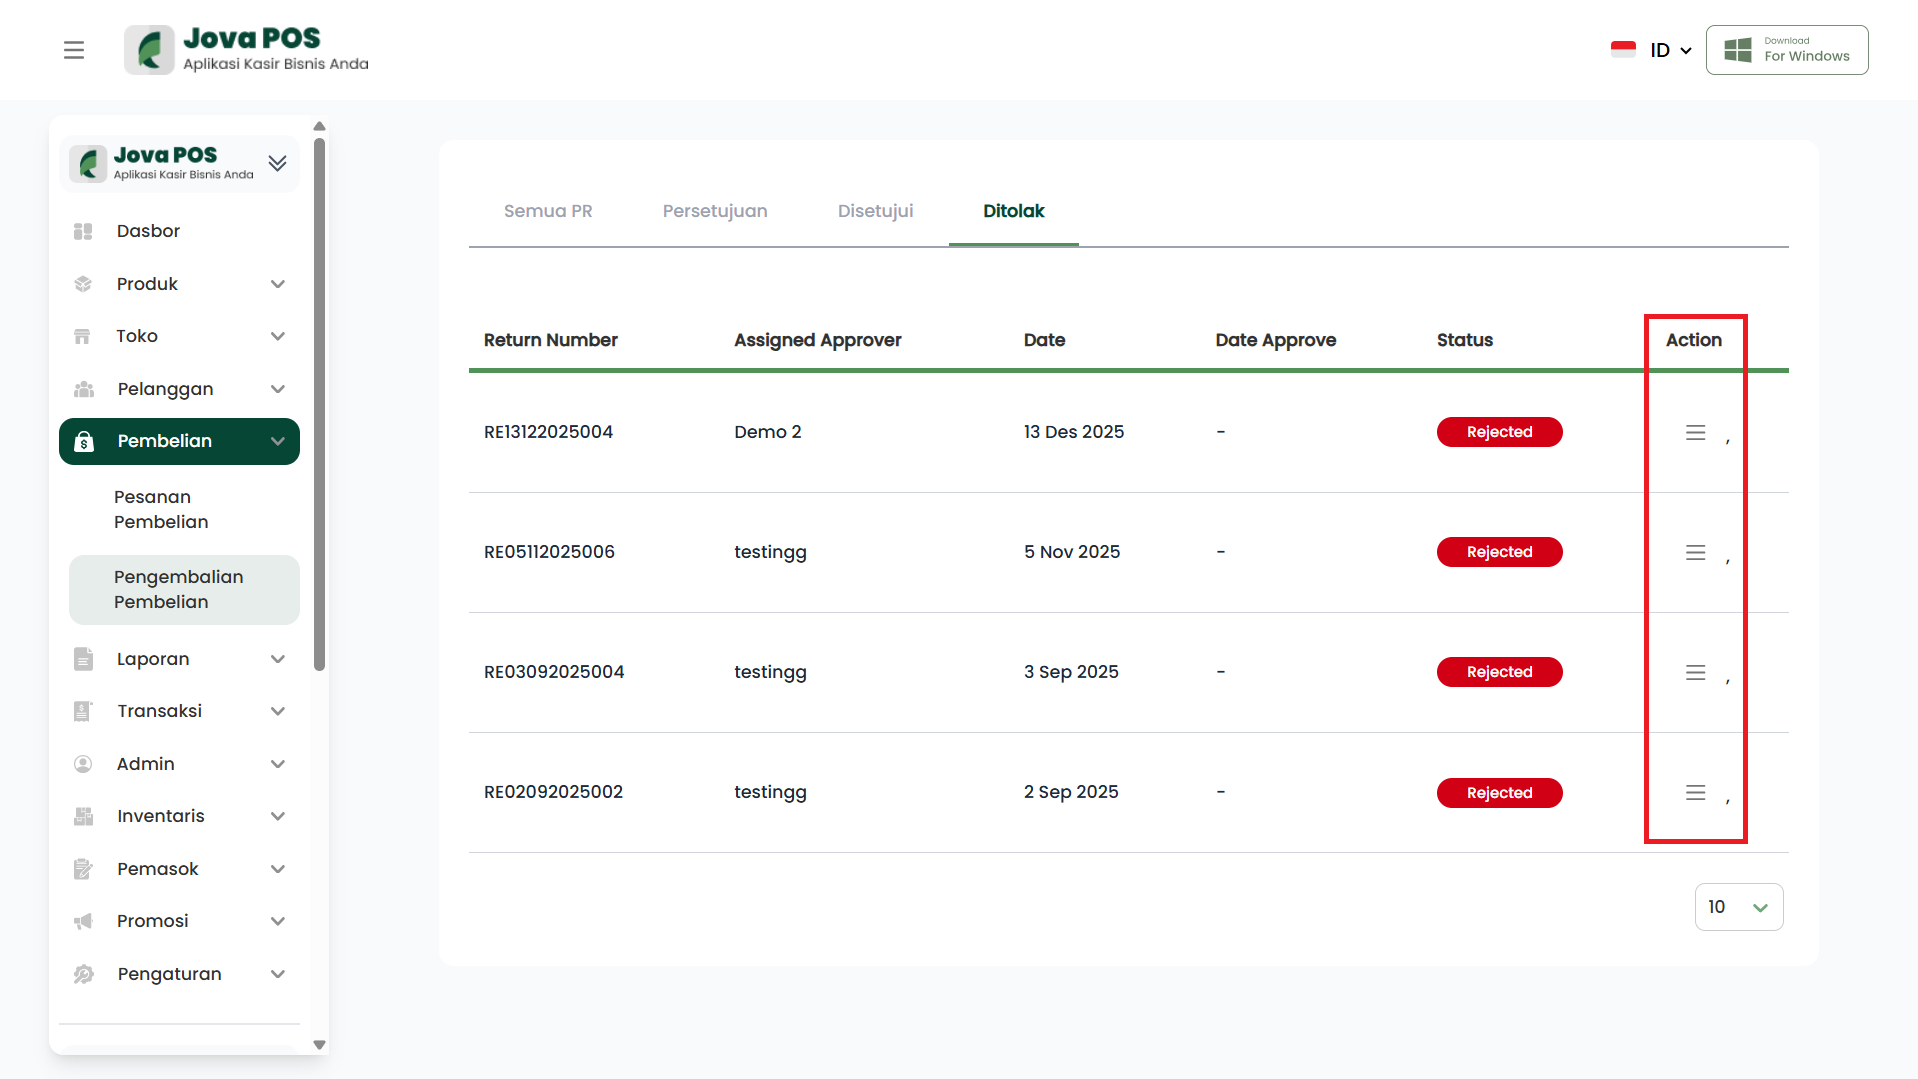
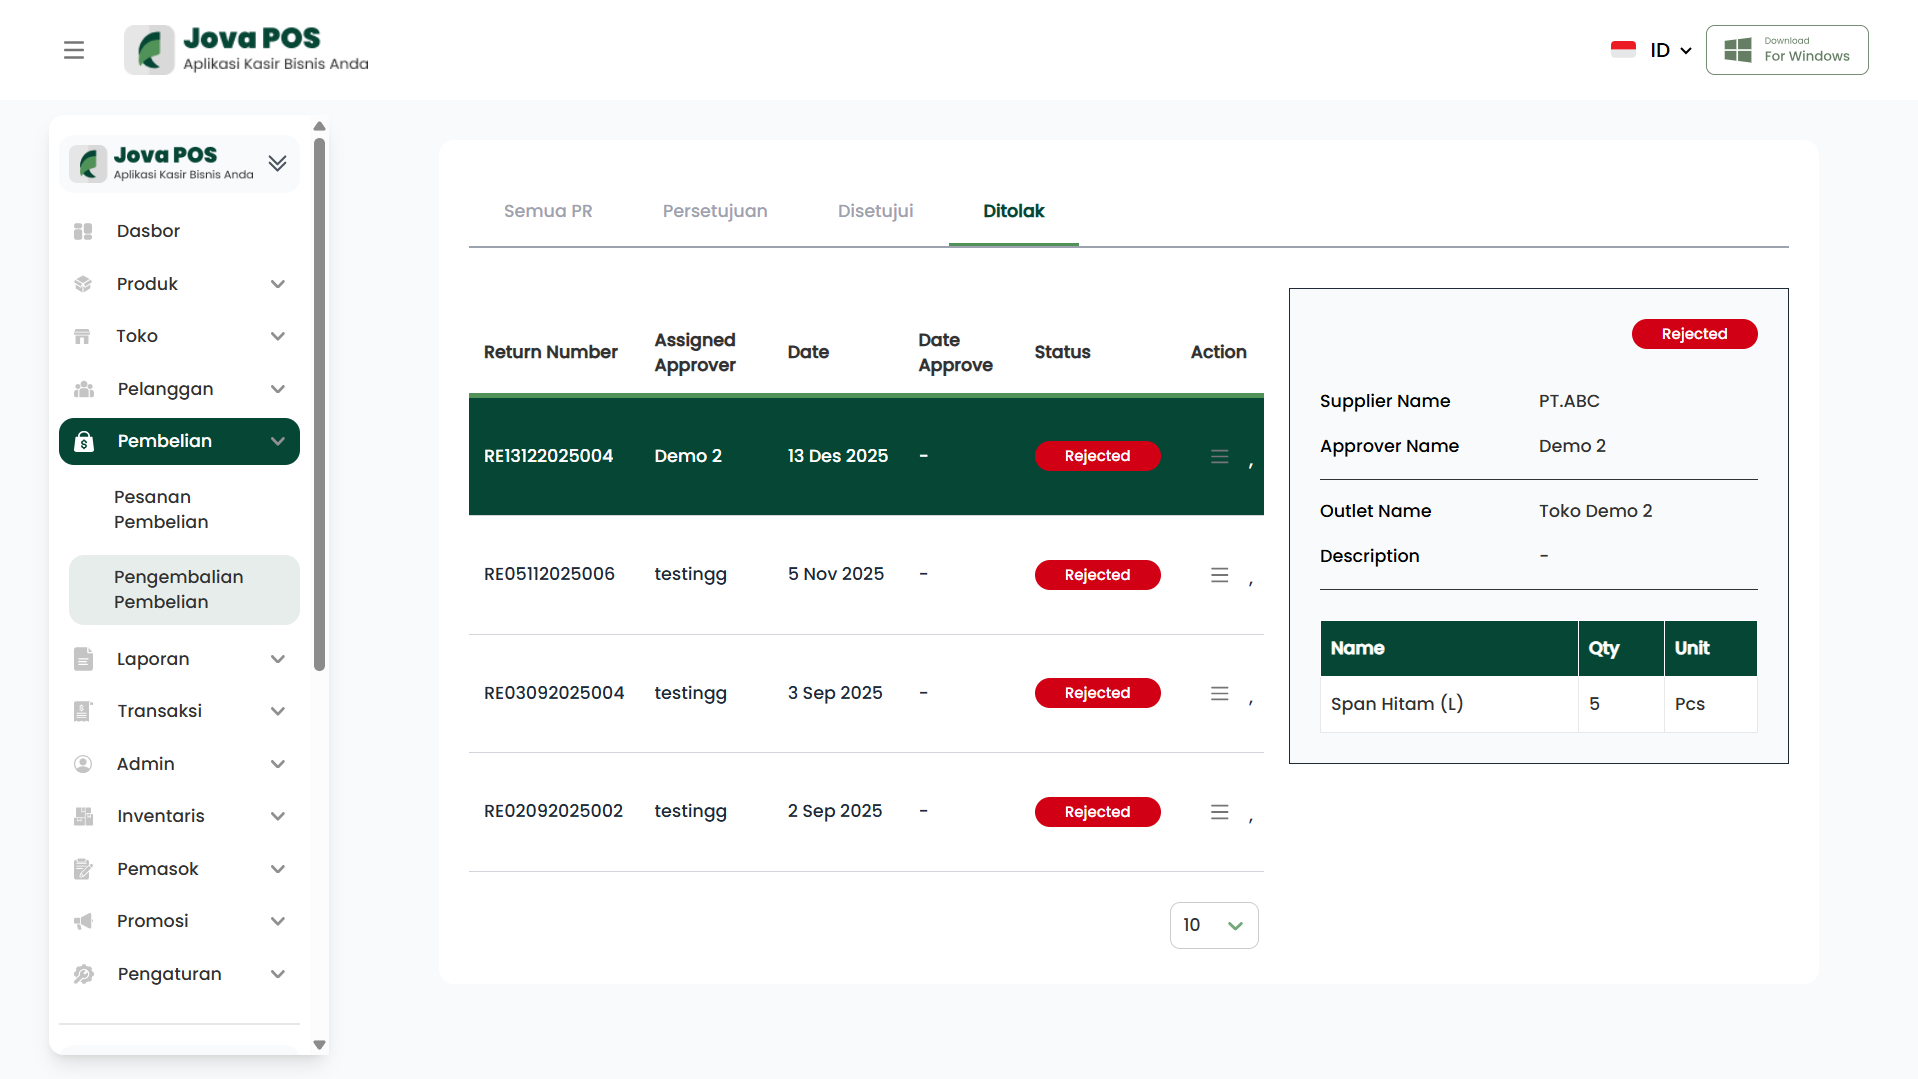
8.1 Viewing rejected PR details
- Click the Action button (three-line icon) on the PR row.
- PR details appear in the right panel, along with a Rejected badge and supplier, approver, outlet, and returned items information.
8.2 Follow-up if PR is rejected
- Check the history/notes in the PR details (if available) to find out the reason for rejection.
- If needed, create a new PR and make sure the approver is correct, the return quantity is appropriate, and the description is clear.